A 2024 survey by the American Home Fitness Association found that 68% of garage gym owners trained more consistently than they did at commercial gyms, citing convenience and zero commute time as the primary factors. What starts as a simple idea—converting your garage into a training space—becomes one of the best investments in your long-term fitness when done right.
Quick Summary:
- Rubber horse stall mats (3/4-inch thick) provide the best cost-to-performance flooring solution at around $50 per 4×6 mat
- A power rack, Olympic barbell, and bumper plates form the foundation of any serious garage gym
- Three budget tiers ($1,000, $2,500, and $5,000) each provide complete training capability with different equipment quality levels
- Climate control and proper ventilation turn a seasonal training space into a year-round facility
- Wall-mounted storage and strategic layout planning maximize usable training area in limited space
Planning Your Space
Measure your garage dimensions and ceiling height before buying equipment. The minimum functional space is 8×8 feet with 8-foot ceilings, though 10×10 with 9-foot ceilings provides better clearance for overhead movements.
Mark out your training area with tape. Stand in the center and perform air squats, overhead presses, and jumping jacks to test clearance. Standard Olympic bars are 7 feet long—you need at least 3 feet of clearance on each side of your squat rack for plate loading.
Check your garage door opener mechanism. Low-hanging openers may require equipment relocation or a wall-mounted upgrade. Electrical outlets should be accessible without running cords across training areas.
Flooring Solutions
The floor is your foundation, both literally and financially. Concrete alone destroys barbells, damages plates, and punishes your joints during any dropped lifts.
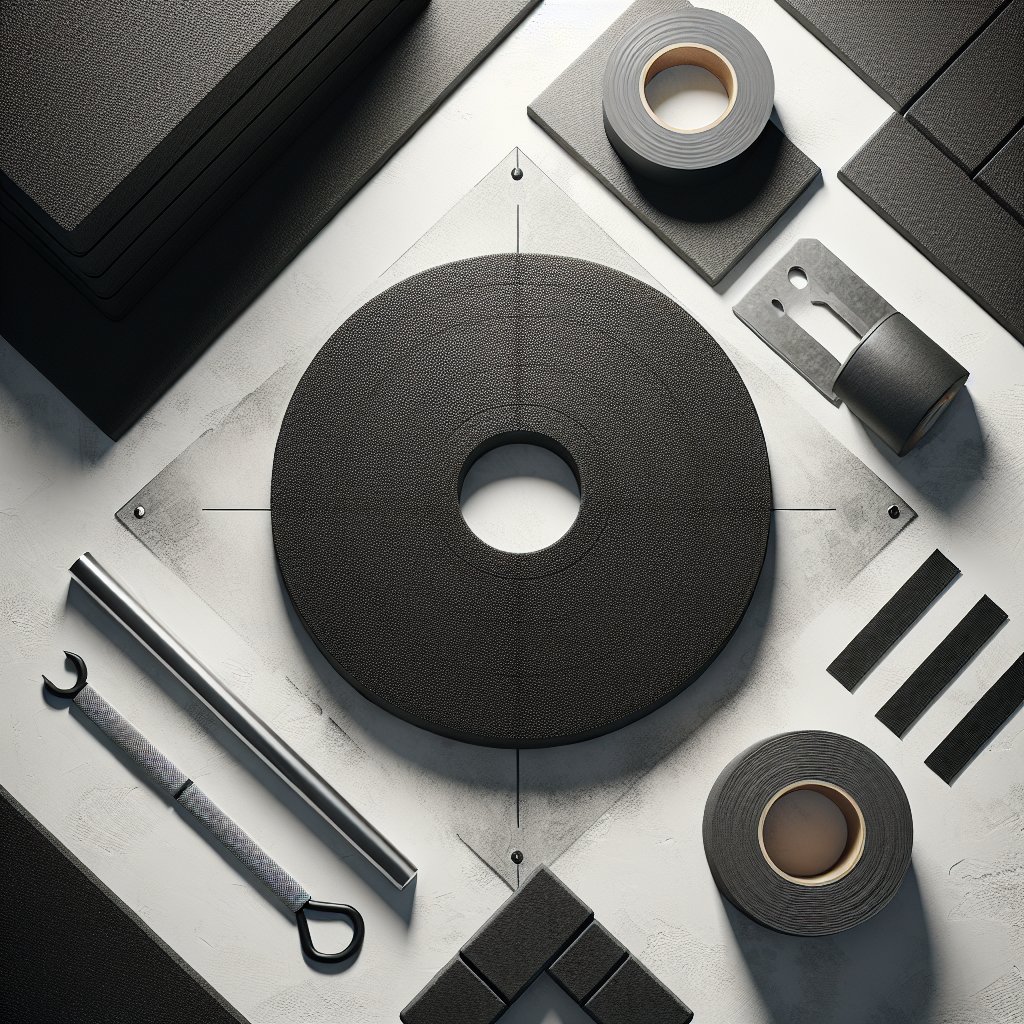
Horse stall mats remain the gold standard for garage gyms. These 3/4-inch thick rubber mats (typically 4×6 feet) cost around $50 each at farm supply stores like Tractor Supply. They're designed to handle horses, which means they easily withstand dropped barbells. For a standard two-car garage gym area (roughly 12×12 feet), expect to spend $200-300 for complete coverage.
The mats arrive with a strong rubber smell that dissipates over 1-2 weeks with proper ventilation. Clean them with Simple Green or dish soap—avoid harsh chemicals that break down rubber. Interlock the mats by alternating seam patterns, but don't expect a perfect fit—these are farm products, not precision-cut tiles.
Rubber tiles offer cleaner edges and easier installation but cost 2-3 times more for equivalent thickness. Plywood platforms (3/4-inch sheets topped with stall mats) work well for Olympic lifting areas where you're dropping barbells from overhead, providing extra shock absorption and protecting your concrete foundation.
Our comprehensive home gym essentials guide covers additional flooring considerations for different training styles.
Verdict: Horse stall mats provide unbeatable value for garage gyms—they're nearly indestructible, protect both equipment and concrete, and cost a fraction of specialized gym flooring while performing just as well.
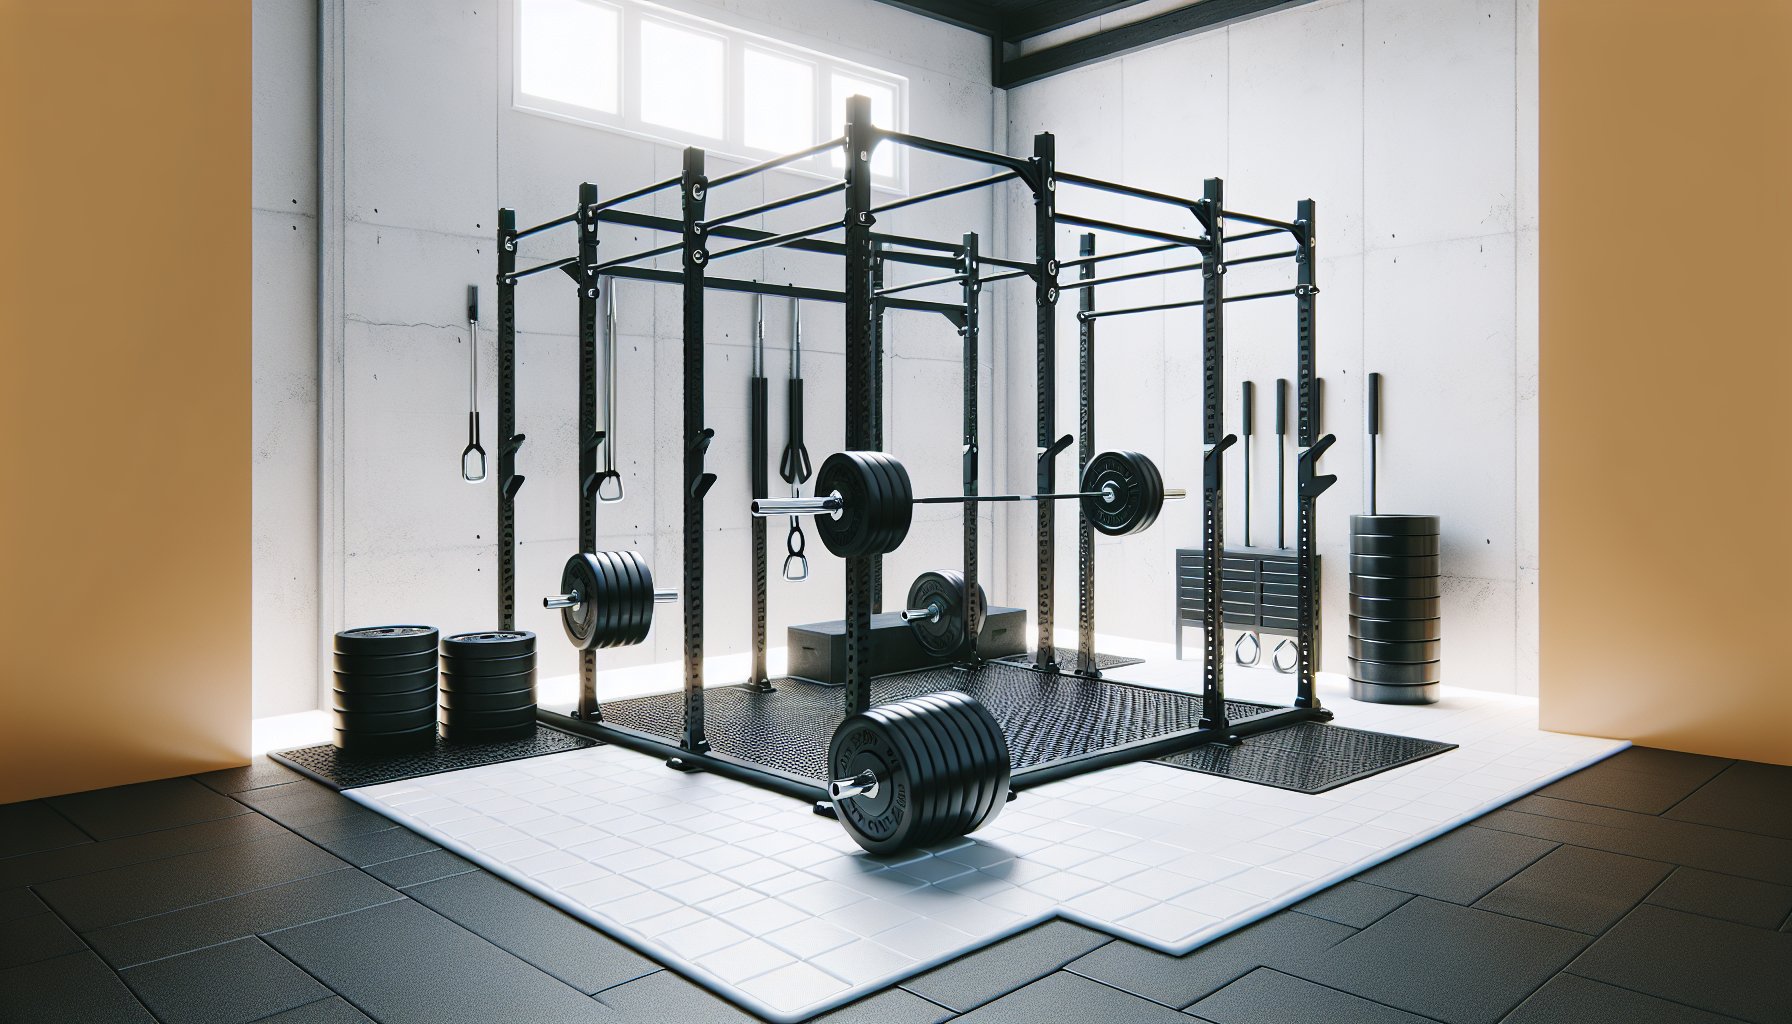
Essential Equipment Tier System
The $1,000 Starter Setup
- REP Fitness PR-1100 Power Rack (around $350) - basic but solid rack with pull-up bar and safety pins
- CAP Barbell Olympic Bar (approximately $150) - entry-level bar that handles 300+ pounds
- 300 pounds of iron plates (around $300)
- Flat bench (around $100)
- Horse stall mats (around $100 for 8×8 coverage)
This setup handles squats, deadlifts, bench press, overhead press, rows, and pull-ups. You can run programs like Starting Strength or 5/3/1 without limitations.
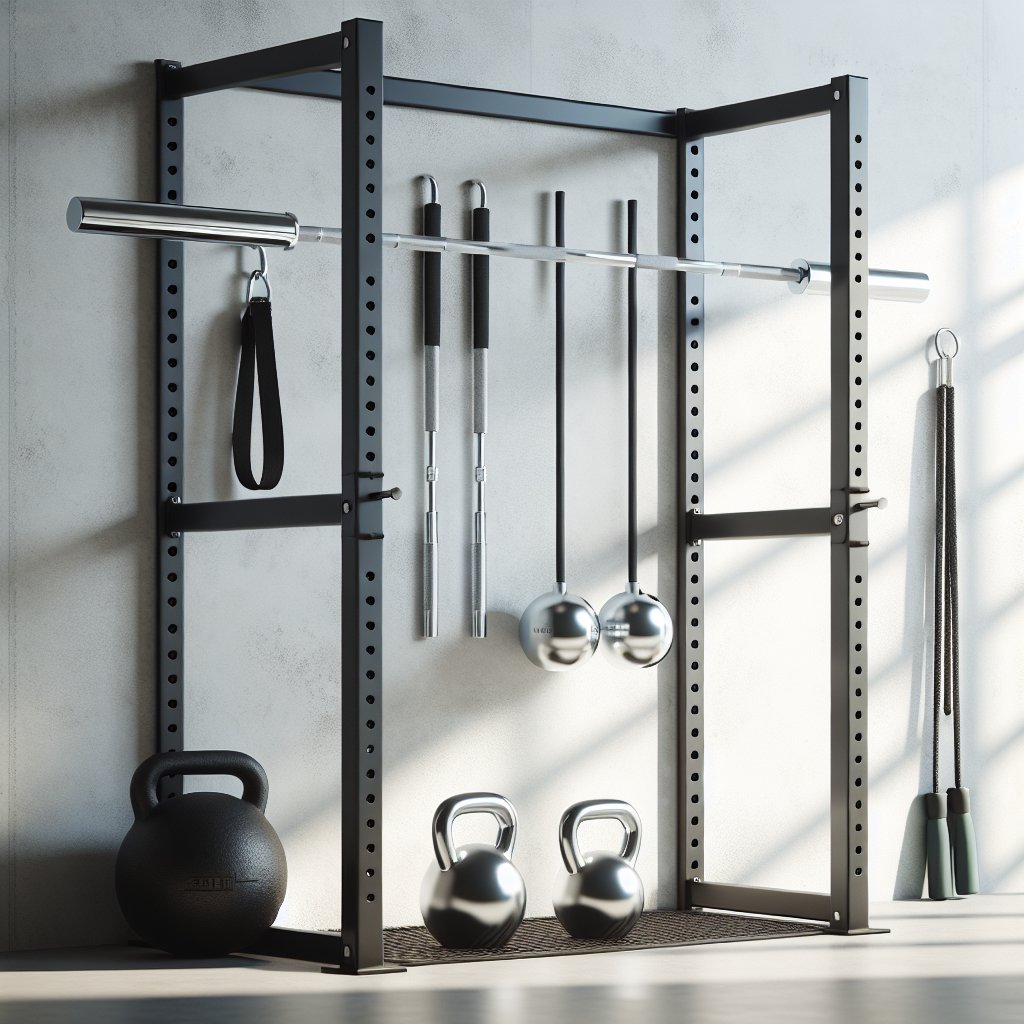
The $2,500 Intermediate Build
- Rogue R-3 Power Rack (around $700) - bomber construction with accessory compatibility
- Rogue Ohio Bar (approximately $325) - significant upgrade in knurling, spin, and durability
- 400 pounds of bumper plates (around $600)
- REP Fitness Adjustable Bench (around $300) - incline, decline, and flat positions
- Platform materials (around $200)
- Dip attachment and landmine (around $150)
- Flooring for 12×12 space (around $250)
This setup supports Olympic lifting and progressive overload to advanced levels. The quality barbell upgrade transforms your training—better knurling and bearing spin make technical lifts feel completely different.
The $5,000+ Complete Garage Gym
- Rogue RML-490C Power Rack (around $1,200)
- Rogue Ohio Power Bar and specialized bars (approximately $800)
- 500+ pounds of calibrated plates (around $1,200)
- Rogue Adjustable Bench 3.0 (around $600)
- Concept2 RowErg or BikeErg (around $900)
- Full platform build (around $300)
- Wall-mounted storage (around $200)
- Climate control (around $500)
- Flooring for 16×20 space (around $600)
This level builds equipment that lasts decades and supports any training goal. Multiple barbells allow supersets with loaded weights. Calibrated plates ensure accurate progressive overload.
Check our budget home gym guide for strategies to build gradually across these tiers.
Climate Control and Ventilation
Temperature extremes kill garage gym consistency. A 2023 study in the Journal of Environmental Psychology found that environmental discomfort was the leading cause of abandoned workout sessions in home gyms, ahead of time constraints or motivation issues.
Summer heat requires either air conditioning (expensive) or strategic ventilation. A box fan in the doorway creates airflow. Opening the garage door during early morning or evening sessions when temperatures drop makes summer training tolerable in most climates. Insulating your garage door ($200-400 for DIY kits) reduces heat transfer significantly.
Winter cold affects barbells and plates—metal becomes painfully cold to grip. A small space heater (around $100) running 15 minutes before your session brings equipment to tolerable temperatures. Store chalk, resistance bands, and other temperature-sensitive items indoors.
Humidity causes rust on barbells and plates. Apply a thin coat of 3-IN-ONE oil to barbell sleeves and shafts monthly. Store plates off the floor on vertical storage trees where air can circulate. A dehumidifier (around $200) protects equipment in consistently humid climates.
Layout and Organization Strategy
Position your squat rack perpendicular to the garage door so you face into the garage when squatting. This provides maximum clearance for forward/backward movement.
Wall-mounted storage keeps floor space clear. Vertical plate trees organize weights by size. Barbell wall mounts (around $30) store bars at shoulder height. Pegboard systems handle smaller accessories.
Create distinct zones: main lifting platform, separate deadlift area, and accessory work space. Mount mirrors on walls perpendicular to your barbell path—never where bars could hit them.
Our home workout guide includes detailed programming for garage gym equipment.
Noise and Neighbor Considerations
Dropped barbells create noise complaints. If you share walls with neighbors or have bedrooms above the garage, noise management becomes critical. Stall mats reduce impact noise by 40-50% compared to bare concrete, but they don't eliminate it.
Crash pads (around $200 for a pair) absorb the final impact of dropped Olympic lifts. Stack two layers of stall mats in your primary drop zone for additional dampening. Schedule heavy dropping sessions during daytime hours and communicate with neighbors before problems start.
Some homeowner associations and rental agreements restrict home gyms. Check your HOA bylaws and lease terms before investing thousands in equipment. Most regulations focus on commercial use, structural modifications, or noise—a personal garage gym rarely violates restrictions, but verify first.
Insurance and Safety Considerations
Homeowner's insurance typically covers gym equipment as personal property. For $5,000+ investments, document everything with photos and receipts. Some insurers offer scheduled property endorsements for high-value items.
If friends train in your garage, verify your liability coverage—some policies exclude injuries during athletic activities. A waiver doesn't provide legal protection.
Install safety equipment properly. J-cups must be rated for your lifting loads. Set safety pins at appropriate heights for failed reps. A lifting belt provides additional safety for heavy lifts.
Keep a first aid kit accessible with tape, ice packs, antiseptic, and bandages. Keep your phone within reach.
Power and Lighting Upgrades
Standard garage lighting creates shadows that affect depth perception. LED shop lights (around $40 each) installed in pairs provide bright, even illumination. Install lights perpendicular to your barbell path—never directly overhead where bars could hit them. 5000K color temperature mimics commercial gym lighting.
Add dedicated outlets for fans, heaters, and music systems. A 20-amp circuit handles most garage gym loads. For significant climate control equipment, consult an electrician.
Weather-resistant Bluetooth speakers (around $100-200) provide motivation without failing in dusty, temperature-variable environments.
Frequently Asked Questions
Do I need to reinforce my garage floor for a home gym?
Residential garage floors are typically 4-6 inches of concrete designed to support vehicles weighing thousands of pounds. A fully loaded squat rack with 500 pounds maxes out around 1,200 pounds total—well within normal capacity. Reinforcement is unnecessary unless you're installing competition-grade equipment or your foundation has existing structural issues.
How do I prevent rust on equipment in an unconditioned garage?
Apply a thin coat of 3-IN-ONE oil to barbells monthly, store plates on vertical trees for air circulation, and run a dehumidifier if you live in humid climates. Wipe down equipment after sessions to remove salt from sweat. Cover equipment with moving blankets during extended periods without use.
What's the minimum garage size for a functional gym?
An 8×8 foot area with 8-foot ceilings provides space for a compact rack and barbell work. A single-car garage (12×20 feet) comfortably accommodates a complete setup. Two-car garages (20×20 feet) allow extensive equipment and dedicated training zones.
How much does climate control add to utility bills?
A space heater for a 90-minute winter session costs $0.50-0.75 per workout. Window-unit AC for summer training costs $1-2 per session. Insulating your garage door reduces heating and cooling costs by 30-40%.
Do I need bumper plates or are iron plates sufficient?
Iron plates work perfectly if you're not dropping barbells from overhead. For Olympic lifts (cleans, snatches, jerks), bumper plates protect your barbell and floor. A hybrid approach uses bumper plates for inner positions and iron plates for additional weight.
How do I deal with dust and debris in the garage?
Sweep or vacuum weekly before sessions. Rubber flooring traps dust rather than releasing it into the air. Close interior doors during dusty projects. An air purifier (around $150) removes particulates but isn't essential.
Can I build a garage gym if I still park cars inside?
Yes, if you're willing to move equipment or park outside during training. Some build portable platforms on casters, others reclaim space permanently. A middle approach clears one bay for gym space while parking a vehicle in the other bay.
What maintenance does garage gym equipment require?
Brush barbell knurling monthly with a brass brush. Oil barbell sleeves monthly. Tighten rack bolts every 3-6 months. Check safety equipment before sessions. Deep clean mats quarterly. Inspect J-cups and safety pins for wear. Well-maintained equipment lasts decades.
The Bottom Line
A well-planned garage gym eliminates commute time, monthly fees, and equipment waits while providing complete control over your training environment. Start with proper flooring and core equipment—power rack, barbell, and plates—then expand based on your training style and budget. Climate control and organization transform a basic setup into a year-round facility you'll actually use consistently, which makes it one of the highest-return investments in your fitness journey.
Sources:
- American Home Fitness Association. 2024 Home Gym Usage Survey. https://www.ahfafitness.org/research/home-gym-usage
- Journal of Environmental Psychology. Environmental Factors Affecting Home Exercise Adherence. 2023;85:102034. https://www.sciencedirect.com/journal/journal-of-environmental-psychology
- American Council on Exercise. Home Gym Safety Guidelines. https://www.acefitness.org/resources/safety/
- National Strength and Conditioning Association. Facility Design and Layout Standards. https://www.nsca.com/education/articles/